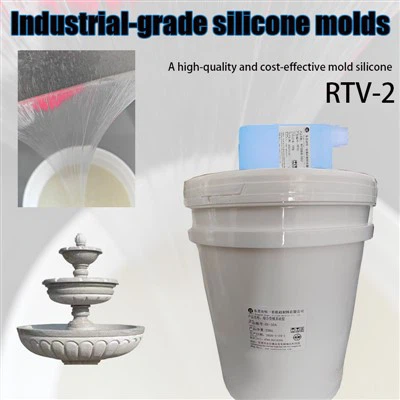
Can I use DIY handmade silicone to make jewelry molds?
In the world of jewelry making, the pursuit of uniqueness and creativity often leads artisans to explore various materials and techniques. One such material that has gained significant popularity in recent years is DIY handmade silicone. As a supplier of DIY handmade silicone, I am frequently asked whether it can be used to make jewelry molds. The answer is a resounding yes, and in this blog post, I will delve into the details of using DIY handmade silicone for jewelry mold making.
Understanding DIY Handmade Silicone
DIY handmade silicone is a versatile material that offers several advantages for jewelry mold making. It is a two - part silicone rubber compound that, when mixed together, cures to form a flexible and durable mold. This type of silicone is known for its excellent detail reproduction, which is crucial when making jewelry molds as it allows for the capture of even the finest details of the original jewelry piece.
There are different types of DIY handmade silicone available in the market, each with its own set of properties. For example, some silicones are designed for high - temperature applications, while others are more suitable for low - temperature environments. When choosing a silicone for jewelry mold making, it is important to consider factors such as the type of jewelry you want to replicate, the curing time, and the flexibility of the cured silicone.
Advantages of Using DIY Handmade Silicone for Jewelry Molds
- High - Precision Replication: DIY handmade silicone can achieve a high level of precision, allowing you to create molds that accurately reproduce the shape and details of your jewelry. Whether it's a delicate filigree design or a complex gemstone setting, the silicone mold can capture every nuance. To learn more about how to achieve high precision and zero shrinkage for perfect replication, you can visit How To Achieve High Precision And Zero Shrinkage For Perfect Replication?.
- Flexibility: The cured silicone is flexible, which makes it easy to remove the finished jewelry from the mold without damaging the piece. This flexibility also allows for the creation of molds with undercuts, which can be challenging to achieve with other mold - making materials.
- Durability: DIY handmade silicone molds are durable and can be used multiple times. This makes them a cost - effective option for jewelry makers, especially those who produce multiple copies of the same design.
- Versatility: Silicone molds can be used with a variety of casting materials, including resin, wax, and metal. This versatility allows jewelry makers to experiment with different materials and techniques to create unique pieces.
Steps to Make Jewelry Molds with DIY Handmade Silicone
- Prepare the Original Jewelry Piece: Clean the jewelry piece thoroughly to remove any dirt, oil, or debris. You can use a mild detergent and a soft brush to clean the piece, and then dry it completely.
- Create a Mold Box: A mold box is used to contain the silicone while it cures. You can make a mold box using cardboard, wood, or plastic. Make sure the mold box is large enough to accommodate the jewelry piece with some extra space around it.
- Mix the Silicone: Follow the manufacturer's instructions to mix the two - part silicone compound. Make sure to mix the silicone thoroughly to ensure a consistent cure.
- Pour the Silicone: Slowly pour the mixed silicone into the mold box, covering the jewelry piece completely. Use a toothpick or a small brush to remove any air bubbles that may form.
- Let the Silicone Cure: The curing time of the silicone depends on the type of silicone and the environmental conditions. Generally, it takes a few hours to a day for the silicone to cure completely.
- Remove the Mold: Once the silicone has cured, carefully remove the mold from the mold box. Gently peel the silicone away from the jewelry piece to reveal the mold.
Tips for Using DIY Handmade Silicone for Jewelry Molds
- Use a Release Agent: To make it easier to remove the jewelry from the mold, you can apply a release agent to the jewelry piece before pouring the silicone. This will prevent the silicone from sticking to the jewelry.
- Work in a Well - Ventilated Area: Some silicones may emit fumes during the curing process. It is important to work in a well - ventilated area to avoid inhaling these fumes.
- Store the Silicone Properly: Store the silicone in a cool, dry place to prevent it from curing prematurely.
Other Applications of DIY Handmade Silicone
Apart from jewelry mold making, DIY handmade silicone has other applications in the creative industry. For example, it can be used to make molds for candles. Candle silicone mold liquid is specifically designed for creating candle molds, allowing you to make unique and personalized candles. Additionally, condensation mold silicone inks can be used for concrete or cement projects. You can find more information about Condensation Mold Silicone Inks For Concrete/Cement.
Conclusion
In conclusion, DIY handmade silicone is an excellent choice for making jewelry molds. It offers high precision, flexibility, durability, and versatility, making it a popular option among jewelry makers. Whether you are a professional jeweler or a hobbyist, using DIY handmade silicone can help you bring your creative ideas to life.


If you are interested in purchasing DIY handmade silicone for your jewelry mold - making projects, please feel free to contact us. We offer a wide range of high - quality silicone products that are suitable for various applications. Our team of experts is also available to provide you with technical support and advice.
References
- General knowledge about silicone materials and jewelry mold - making techniques.
- Information from the websites How To Achieve High Precision And Zero Shrinkage For Perfect Replication?, Condensation Mold Silicone Inks For Concrete/Cement, and Candle silicone mold liquid.