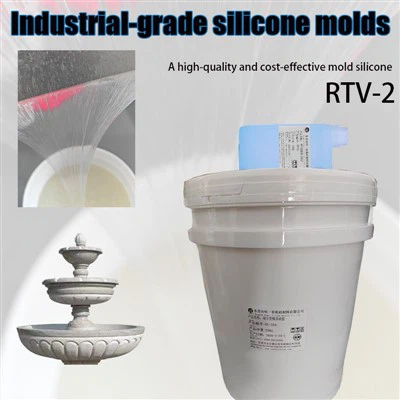
Hey there! I'm stoked to share some cool insights on how to make a complex - shaped embossing mold with embossing silicone. As an embossing silicone supplier, I've seen firsthand the magic that can happen when you work with this amazing material.
Why Choose Embossing Silicone?
First off, let's talk about why embossing silicone is such a great choice. It's super flexible, which means it can easily take on all sorts of complex shapes. Whether you're looking to create a detailed logo, a unique pattern, or some crazy 3D design, embossing silicone has got your back.
Another awesome thing about it is its durability. Once you've made your mold, it can withstand multiple uses without losing its shape or quality. This makes it perfect for both small - scale DIY projects and large - scale industrial production.
Getting Started: Materials and Tools
Before you jump into making your complex - shaped embossing mold, you'll need to gather a few things. Here's a quick list:
- Embossing Silicone: Of course, this is the star of the show. As a supplier, I can tell you that there are different types of embossing silicone out there, each with its own set of properties. You'll want to choose the one that best suits your project. For example, if you're making a mold for heat transfer printing, you might want to check out our Heat Transfer Printing Middle Layer Silicone.
- Master Model: This is the object that you'll be making a mold of. It can be anything from a handmade clay sculpture to a 3D - printed model. Make sure it's clean and dry before you start.
- Mixing Containers: You'll need some containers to mix your silicone in. Make sure they're clean and free of any debris.
- Stirring Tools: A couple of stir sticks or spatulas will do the trick.
- Release Agent: This helps to prevent the silicone from sticking to the master model. You can find release agents specifically designed for silicone molds at most craft stores.
Step - by - Step Guide to Making the Mold
Now that you've got all your materials ready, let's get down to business. Here's a step - by - step guide on how to make a complex - shaped embossing mold with embossing silicone:
Step 1: Prepare the Master Model
First, clean your master model thoroughly. Remove any dust, dirt, or fingerprints. Then, apply a thin layer of release agent to the model. Make sure to cover all the surfaces, including any crevices or details. Let the release agent dry completely.


Step 2: Mix the Silicone
Read the instructions on your embossing silicone carefully. Most silicones come in two parts: a base and a catalyst. Measure out the correct amounts of each part and pour them into your mixing container. Use your stirring tool to mix the two parts together thoroughly. Make sure there are no streaks or unmixed areas.
Keep in mind that the mixing time and ratio can vary depending on the type of silicone you're using. So, always follow the manufacturer's guidelines.
Step 3: Pour the Silicone
Once your silicone is well - mixed, it's time to pour it over the master model. Start by pouring a small amount in the center of the model and then slowly work your way outwards. Try to pour the silicone as smoothly as possible to avoid creating air bubbles.
If you do end up with some air bubbles, you can use a toothpick or a small needle to pop them. You can also tap the container gently on a hard surface to help the bubbles rise to the surface.
Step 4: Let it Cure
After you've poured the silicone, let it cure according to the manufacturer's instructions. This usually takes anywhere from a few hours to a full day, depending on the type of silicone and the environmental conditions. Make sure to keep the mold in a warm, dry place during the curing process.
Step 5: Demold
Once the silicone has cured, it's time to remove the mold from the master model. Start by gently peeling the edges of the mold away from the model. Then, slowly work your way around the model until you can lift the mold off completely.
If the mold is sticking in some areas, you can use a release agent or a small amount of lubricant to help loosen it. Just be careful not to damage the mold or the master model.
Tips for Making Complex - Shaped Molds
Making a complex - shaped embossing mold can be a bit tricky, but with these tips, you'll be well on your way to success:
- Use a Multi - Piece Mold: If your master model has undercuts or very complex shapes, you might want to consider making a multi - piece mold. This involves creating separate sections of the mold and then assembling them later. It can be a bit more time - consuming, but it's often the best way to get a clean, detailed mold.
- Add Reinforcement: For larger or more complex molds, you might want to add some reinforcement to the silicone. You can do this by embedding a layer of fiberglass or other reinforcing material into the silicone while it's still wet. This will help to prevent the mold from warping or breaking.
- Test the Mold: Before you start using the mold for production, it's a good idea to test it out first. Make a few test casts using a sample material to make sure the mold is working properly and that the details are coming out as expected.
Applications of Embossing Silicone Molds
Embossing silicone molds have a wide range of applications. Here are just a few examples:
- Crafting: You can use embossing silicone molds to create all sorts of handmade crafts, such as jewelry, keychains, and decorative items.
- Printing: As mentioned earlier, embossing silicone molds are great for heat transfer printing. You can use them to create detailed logos and patterns on clothing, bags, and other textiles. Check out our 3d Embossed Silicone for more info on this.
- Industrial Production: In the industrial world, embossing silicone molds are used for manufacturing a variety of products, such as automotive parts, electronic components, and medical devices.
Conclusion
Making a complex - shaped embossing mold with embossing silicone is a fun and rewarding process. With the right materials, tools, and techniques, you can create high - quality molds that will last for a long time.
If you're interested in purchasing embossing silicone for your next project, or if you have any questions about the process, don't hesitate to reach out. We're here to help you every step of the way. Whether you're a hobbyist or a professional, we've got the products and expertise to meet your needs. So, why not give it a try and see what amazing things you can create with embossing silicone?
References
- General knowledge of embossing silicone properties and mold - making techniques from industry experience.
- Manufacturer's instructions for embossing silicone products.