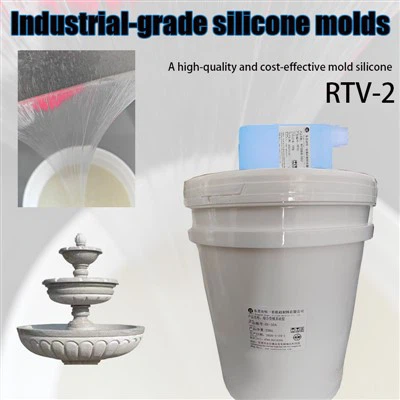
Making a flip mold with silicone for a textured surface can be a rewarding process, especially when you're working on projects that require high - fidelity replication of intricate details. As a Flip mold silicone supplier, I'm here to guide you through the step - by - step process of creating such a mold.
Understanding the Basics of Silicone for Flip Molds
Before we dive into the process, it's essential to understand the different types of silicone available for flip molds. There are various options, each with its own characteristics and applications.
Candle silicone mold liquid is often used for creating molds for candles. It has properties that allow it to capture fine details, which is crucial for creating unique candle designs.
Condensation Mold Silicone is another popular choice. It cures through a condensation reaction, and it's suitable for a wide range of applications, from small crafts to larger industrial projects.
Building Silicone Mold Liquid is designed for creating molds for building elements. It can withstand the stress and pressure associated with casting large - scale building components.
Silicone For Large - scale Stone Buildings is formulated to replicate the texture and appearance of stone. It's ideal for architectural projects where a realistic stone finish is required.
Condensation Mold Silicone Inks ShoreA 5 has a specific shore hardness, which makes it suitable for certain types of textured surfaces. The shore hardness affects the flexibility and durability of the mold.
Step 1: Prepare the Original Object
The first step in making a flip mold is to select the original object with the textured surface you want to replicate. This object should be clean and free of any dust, debris, or grease. You can use a mild detergent and water to clean it, followed by a thorough rinse and drying.


Once the object is clean, you may need to apply a release agent. A release agent prevents the silicone from sticking to the original object, making it easier to remove the mold later. There are various release agents available, such as silicone - based sprays or waxes. Apply the release agent evenly on the surface of the object and let it dry completely.
Step 2: Choose the Right Silicone
Based on the nature of your project and the texture of the surface, select the appropriate silicone. Consider factors such as the size of the mold, the level of detail required, and the type of material you'll be casting in the mold.
If you're working on a small - scale project with fine details, Candle silicone mold liquid might be a good choice. For larger projects or those that require more durability, Building Silicone Mold Liquid could be more suitable.
Step 3: Mix the Silicone
Most silicone products come in two parts: a base and a catalyst. Follow the manufacturer's instructions carefully to mix the two parts in the correct ratio. Use a clean mixing container and a stir stick. Mix the silicone thoroughly for several minutes to ensure a uniform mixture.
During the mixing process, it's important to avoid introducing air bubbles. Air bubbles can cause defects in the mold. You can use a vacuum chamber to remove air bubbles from the mixed silicone. If you don't have a vacuum chamber, you can tap the mixing container gently on a hard surface to let the air bubbles rise to the surface.
Step 4: Pour the Silicone
Place the original object in a suitable container. The container should be large enough to hold the object and the silicone. Slowly pour the mixed silicone over the object, starting from one side and allowing it to flow evenly. Make sure the silicone covers the entire textured surface of the object.
If the object has a complex shape or deep recesses, you may need to pour the silicone in multiple layers. Let each layer cure slightly before adding the next one. This helps to ensure that the silicone fills all the details of the texture.
Step 5: Let the Silicone Cure
The curing time of the silicone depends on the type of silicone and the environmental conditions. Follow the manufacturer's instructions for the recommended curing time. Generally, it can take anywhere from a few hours to a few days for the silicone to fully cure.
During the curing process, keep the mold in a stable environment with a consistent temperature and humidity. Avoid disturbing the mold while it's curing.
Step 6: Remove the Mold
Once the silicone has fully cured, carefully remove the mold from the container. Gently peel the silicone away from the original object. If there are any areas where the silicone is stuck, you can use a small tool, such as a spatula, to carefully separate it.
Inspect the mold for any defects. If there are any air bubbles or other imperfections, you can try to repair them using additional silicone.
Step 7: Use the Flip Mold
Now that you have your flip mold, you can start using it to cast objects with the same textured surface. Prepare the casting material, such as resin or plaster, and pour it into the mold. Let the casting material cure according to its instructions.
After the casting has cured, remove it from the mold. You should have a replica of the original textured surface.
Tips and Tricks
- Work in a well - ventilated area: Silicone can emit fumes during the mixing and curing process. Make sure you have proper ventilation to avoid inhaling these fumes.
- Practice on a small scale: If you're new to making flip molds, it's a good idea to practice on a small object first. This allows you to get familiar with the process and make any necessary adjustments.
- Store the silicone properly: Keep the silicone in a cool, dry place. Follow the manufacturer's instructions for storage to ensure its quality.
Conclusion
Making a flip mold with silicone for a textured surface is a skill that can be mastered with practice. As a Flip mold silicone supplier, we offer a wide range of high - quality silicone products to meet your needs. Whether you're a hobbyist or a professional, our silicones can help you create detailed and accurate molds.
If you're interested in purchasing our flip mold silicone products or have any questions about the process, we encourage you to contact us for a procurement discussion. We're here to provide you with the best solutions for your projects.
References
- Silicone Mold Making Handbook, [Publisher's Name], [Year of Publication]
- Guide to Textured Surface Replication, [Author's Name], [Year of Publication]