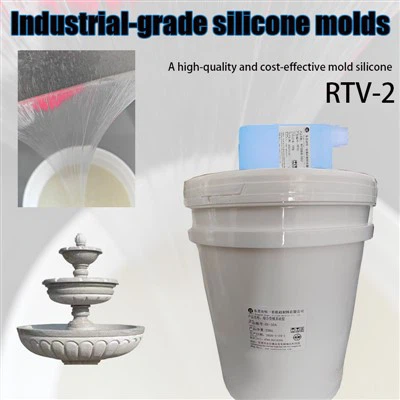
When it comes to the world of DIY crafts, making candles with embedded objects has gained significant popularity in recent years. It adds a unique and personalized touch to the candles, making them not only a source of light but also a piece of art. As a leading supplier of candle silicone liquid, I am excited to share with you the step-by-step process of creating these beautiful candles and how our high-quality silicone liquid can make the entire process a breeze.


Why Choose Candle Silicone Liquid?
Before we dive into the process, let's first understand why candle silicone liquid is the ideal choice for making candles with embedded objects. Silicone has several properties that make it perfect for this purpose:
- Flexibility: Silicone is highly flexible, which means it can easily release the candle from the mold without causing any damage. This is crucial when you have delicate or intricate embedded objects in the candle.
- Heat Resistance: Candles generate heat when they burn, and silicone can withstand high temperatures without deforming or melting. This ensures that the mold remains intact and the candle retains its shape.
- Transparency: Our candle silicone liquid is transparent, allowing you to see the embedded objects clearly through the candle. This adds to the visual appeal of the finished product.
- Easy to Use: Silicone is easy to mix and pour, making it suitable for both beginners and experienced crafters. It also cures quickly, reducing the waiting time for the mold to be ready.
How Should We Choose Silicone?
Choosing the right silicone for your candle-making project is essential. You can refer to this guide How Should We Choose Silicone? to understand the factors you need to consider. When it comes to making candles with embedded objects, you should look for a silicone that has a good balance of flexibility and hardness. A silicone that is too soft may not hold its shape well, while a silicone that is too hard may be difficult to release the candle from.
Step-by-Step Guide to Making Candles with Embedded Objects
Step 1: Gather Your Materials
- Candle Silicone Liquid: As a supplier, we offer a high-quality candle silicone liquid that is specifically formulated for candle making. It has excellent flexibility, heat resistance, and transparency.
- Candle Wax: You can choose from a variety of waxes, such as soy wax, beeswax, or paraffin wax. Each wax has its own unique properties, so choose the one that suits your needs.
- Embedded Objects: This is where you can let your creativity shine. You can use anything from dried flowers, seashells, beads, or small figurines. Just make sure that the objects are safe to use in candles and are not flammable.
- Mold: You can purchase a pre-made mold or create your own using a mold-making kit. If you are using a pre-made mold, make sure it is made of a material that is compatible with silicone, such as plastic or glass.
- Fragrance Oil: If you want to add a pleasant scent to your candles, you can use fragrance oil. Make sure to choose a fragrance oil that is specifically designed for candles.
- Wick: Choose a wick that is appropriate for the size and type of wax you are using.
Step 2: Prepare the Mold
- If you are using a pre-made mold, clean it thoroughly and dry it completely.
- If you are creating your own mold, follow the instructions on the mold-making kit to create the mold.
- Apply a thin layer of mold release agent to the mold to make it easier to release the silicone from the mold later.
Step 3: Mix the Candle Silicone Liquid
- Follow the instructions on the candle silicone liquid package to mix the silicone and the catalyst. Usually, you need to mix them in a specific ratio.
- Stir the mixture thoroughly for at least 2 - 3 minutes to ensure that the silicone and the catalyst are well combined.
- Pour the mixed silicone liquid into a container with a spout for easy pouring.
Step 4: Pour the Silicone into the Mold
- Slowly pour the silicone liquid into the mold, filling it to about half of its height.
- Tap the mold gently on a flat surface to remove any air bubbles that may have formed.
- Place the embedded objects on the silicone surface. You can arrange them in any pattern you like.
- Pour more silicone liquid into the mold to cover the embedded objects completely.
- Tap the mold again to remove any remaining air bubbles.
Step 5: Let the Silicone Cure
- Let the silicone cure according to the instructions on the package. This usually takes about 24 hours at room temperature.
- Once the silicone is fully cured, carefully remove the mold from the silicone. If the mold is difficult to remove, you can use a knife or a spatula to gently pry it off.
Step 6: Prepare the Candle Wax
- Melt the candle wax in a double boiler or a wax melter. Make sure to stir the wax occasionally to ensure that it melts evenly.
- Once the wax is completely melted, remove it from the heat source.
- Add the fragrance oil to the melted wax according to the manufacturer's instructions.
- Stir the wax and fragrance oil mixture thoroughly.
Step 7: Pour the Wax into the Silicone Mold
- Attach the wick to the bottom of the silicone mold using a wick sticker or a small piece of wax.
- Slowly pour the melted wax into the silicone mold until it is full.
- Let the wax cool and solidify completely. This usually takes a few hours.
Step 8: Remove the Candle from the Silicone Mold
- Once the wax is completely solid, gently flex the silicone mold to release the candle.
- Trim the wick to about 1/4 inch in length.
Silicone used for making glassware molds
For those who are interested in more advanced crafting, our silicone is also perfect for Silicone used for making glassware molds. The same properties that make it great for candle molds also apply to glassware molds, giving you even more creative possibilities.
Silicone For Large-scale Stone Buildings
Our silicone also has applications in larger projects. If you are involved in large - scale construction or art projects, you might be interested in Silicone For Large - scale Stone Buildings. It can be used to create molds for stone replicas and other architectural elements.
Tips and Tricks
- Choose the Right Embedded Objects: Make sure the embedded objects are clean and dry before using them. Avoid using objects that may react with the wax or silicone.
- Be Careful with Air Bubbles: Air bubbles can cause imperfections in the candle. To minimize air bubbles, pour the silicone and wax slowly and tap the mold gently.
- Experiment with Different Waxes and Fragrances: Different waxes and fragrances can give your candles different looks and scents. Don't be afraid to experiment to find the combination that you like the most.
Contact Us for Your Silicone Needs
If you are interested in purchasing our high-quality candle silicone liquid or have any questions about our products, we encourage you to contact us for a procurement discussion. Our team is always ready to assist you with your specific requirements and provide you with the best solutions.
References
- "The Complete Guide to Candle Making" by Susan Miller Cavitch
- "Silicone Rubber Technology: A Comprehensive Guide" by Michael P. Stevens