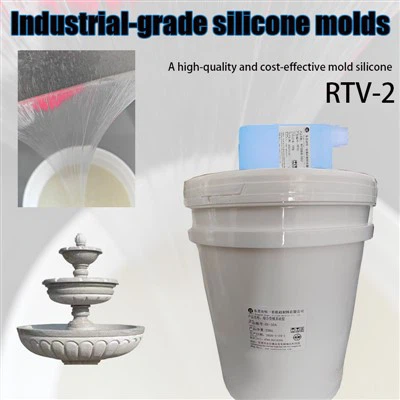
Hey there! As a supplier of Natural Dry Silicone, I'm here to share some tips on how to apply it correctly. Natural Dry Silicone is a great product with a wide range of applications, but getting the application right is crucial to achieve the best results.
Pre - application Preparation
First things first, you need to make sure the surface where you're going to apply the Natural Dry Silicone is clean and dry. Any dirt, dust, or moisture can affect the adhesion of the silicone. You can use a mild detergent and water to clean the surface, and then dry it thoroughly with a clean cloth.
If the surface is porous, like wood or concrete, it's a good idea to prime it. A primer helps the silicone bond better and can improve the overall durability of the application. You can find suitable primers at your local hardware store.
Also, gather all the tools you'll need before you start. This usually includes a caulking gun if you're using the silicone in a tube, a putty knife for spreading, and some masking tape to create clean edges.
Choosing the Right Type of Silicone
We offer different types of silicone products, and choosing the right one for your project is essential.
-
One - Step Silicone: This is a great option if you're looking for a quick and easy application. It's designed to be used in a single step, which saves you time and effort. You can learn more about it One - Step Silicone.
-
Machine - Print Matte Surface Silicone: If you're working on a project that requires a matte finish, this is the way to go. It's perfect for machine - printed applications and gives a smooth, professional look. Check it out Machine - Print Matte Surface Silicone.
-
Reinforced Silicone: For projects that need extra strength and durability, our Reinforced Silicone is the best choice. It can withstand more stress and is ideal for high - traffic areas or applications where the silicone will be under a lot of pressure. Find out more Reinforced Silicone.
Application Process
- Loading the Caulking Gun: If you're using a tube of silicone, cut the tip of the tube at a 45 - degree angle. The size of the opening depends on the width of the joint or area you're filling. Then, insert the tube into the caulking gun and pull the trigger a few times to start the flow of silicone.
- Applying the Silicone: Hold the caulking gun at a 45 - degree angle to the surface and start squeezing the trigger slowly. Move the gun along the joint or area at a steady pace to ensure an even application. Try to keep the bead of silicone the same size throughout the process.
- Smoothing the Silicone: After applying the silicone, use a putty knife or your finger (you can wear a glove if you don't want to get your hands dirty) to smooth the surface. This helps to remove any air bubbles and gives the silicone a neat appearance. Make sure to work quickly because the silicone starts to dry relatively fast.
- Removing the Masking Tape: If you used masking tape to create clean edges, remove it while the silicone is still wet. This will give you sharp, clean lines.
Post - application Care
Once you've applied the Natural Dry Silicone, it's important to let it dry properly. The drying time depends on several factors, such as the thickness of the application, the temperature, and the humidity. In general, it can take anywhere from a few hours to a couple of days.
Avoid touching or disturbing the silicone while it's drying. Also, keep the area well - ventilated to help the drying process. If you need to paint over the silicone, make sure it's completely dry first. You can test the dryness by gently touching the surface. If it feels dry and doesn't leave any residue on your finger, it's ready.
Troubleshooting
Sometimes, things don't go as planned during the application process. Here are some common problems and how to fix them:
- Poor Adhesion: If the silicone doesn't stick to the surface, it could be because the surface wasn't clean or dry enough. You may need to clean the surface again and re - apply the silicone.
- Air Bubbles: To prevent air bubbles, make sure you're applying the silicone at a steady pace and smoothing it properly. If you already have air bubbles, you can use a pin to pop them and then smooth the area again.
- Uneven Application: If the bead of silicone is uneven, you can use a putty knife to even it out while the silicone is still wet.
Why Choose Our Natural Dry Silicone
Our Natural Dry Silicone is of high quality and offers many benefits. It has excellent adhesion, is resistant to water, heat, and chemicals, and has a long - lasting durability. Whether you're a DIY enthusiast or a professional contractor, our products can meet your needs.
If you have any questions about our Natural Dry Silicone or need help with your application, don't hesitate to reach out. We're here to assist you and ensure you get the best results from our products. If you're interested in purchasing our products, we'd love to have a chat with you about your requirements. Just drop us a line and we can start the procurement discussion.


References
- General knowledge about silicone application from industry experience.
- Product specifications and usage guidelines provided by our R & D team.