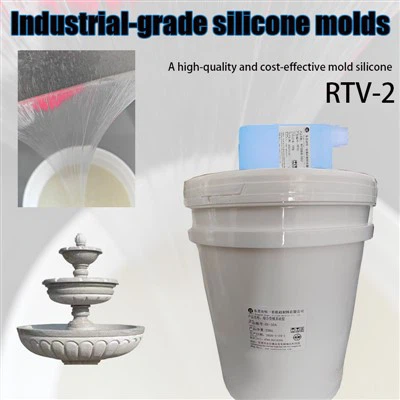
Creating DIY handmade silicone wall art can be a rewarding and creative endeavor. As a DIY handmade silicone supplier, I'm excited to share with you a step-by-step guide on how to make your own stunning silicone wall art. This process allows you to express your creativity and add a unique touch to your living space.
Step 1: Gather Your Materials
Before you start, you'll need to gather the necessary materials. Here's a list of what you'll require:
- Silicone: Choose the right type of silicone for your project. We recommend High Performance Mold Making Silicone - Tin Cure for its excellent molding properties. This silicone is easy to work with and cures to a strong, flexible finish.
- Mold: You can either purchase a pre-made mold or create your own. If you're creating your own mold, you can use materials like plaster, wood, or plastic. Make sure the mold is clean and free of any debris before using it.
- Pigments or Dyes: To add color to your silicone wall art, you'll need pigments or dyes. You can choose from a wide range of colors to create the desired effect.
- Mixing Tools: You'll need a mixing container and a stir stick to mix the silicone and pigments. Make sure the mixing container is clean and dry before using it.
- Release Agent: A release agent is used to prevent the silicone from sticking to the mold. You can use a commercial release agent or a natural alternative like vegetable oil.
- Wall Mounting Hardware: Once your silicone wall art is finished, you'll need to mount it on the wall. You can use screws, nails, or adhesive hooks to mount the art.
Step 2: Prepare the Silicone
Before you start mixing the silicone, make sure you read the instructions carefully. Different types of silicone may have different mixing ratios and curing times. Here's a general guide on how to prepare the silicone:
- Measure the Silicone: Use a measuring cup to measure the appropriate amount of silicone and catalyst. Make sure you follow the mixing ratio specified on the product label.
- Mix the Silicone and Catalyst: Pour the silicone and catalyst into the mixing container and stir them together thoroughly. Use a stir stick to ensure that the mixture is well combined.
- Add Pigments or Dyes: If you want to add color to your silicone, add the pigments or dyes to the mixture and stir them in. Make sure you add the pigments gradually and mix them well to achieve the desired color.
- Remove Air Bubbles: To remove air bubbles from the silicone mixture, you can use a vacuum chamber or a toothpick. If you're using a vacuum chamber, place the mixture in the chamber and turn on the vacuum. If you're using a toothpick, gently stir the mixture with the toothpick to release the air bubbles.
Step 3: Pour the Silicone into the Mold
Once the silicone is prepared, it's time to pour it into the mold. Here's how to do it:
- Apply the Release Agent: Apply a thin layer of release agent to the inside of the mold. This will prevent the silicone from sticking to the mold.
- Pour the Silicone: Slowly pour the silicone mixture into the mold. Make sure you pour the mixture evenly and avoid creating any air bubbles.
- Tap the Mold: Tap the mold gently on a flat surface to remove any air bubbles that may have formed.
- Let the Silicone Cure: Allow the silicone to cure according to the instructions on the product label. This may take several hours or even days, depending on the type of silicone and the temperature.
Step 4: Remove the Silicone from the Mold
Once the silicone has cured, it's time to remove it from the mold. Here's how to do it:
- Carefully Remove the Mold: Gently remove the mold from the silicone. If the silicone is stuck to the mold, you can use a release agent or a tool to help loosen it.
- Trim the Edges: Use a sharp knife or scissors to trim the edges of the silicone. This will give your wall art a clean and professional look.
- Clean the Silicone: Use a damp cloth to clean the silicone and remove any debris or release agent.
Step 5: Mount the Silicone Wall Art
Once the silicone wall art is finished, it's time to mount it on the wall. Here's how to do it:


- Choose the Location: Choose a location on the wall where you want to mount the wall art. Make sure the location is clean and dry.
- Mark the Mounting Holes: Use a pencil to mark the mounting holes on the wall. Make sure the holes are evenly spaced and aligned with the holes on the wall art.
- Drill the Holes: Use a drill to drill the holes in the wall. Make sure the holes are the correct size for the wall mounting hardware.
- Mount the Wall Art: Insert the wall mounting hardware into the holes and attach the wall art to the wall. Make sure the wall art is level and secure.
Tips and Tricks
- Choose the Right Silicone: Make sure you choose the right type of silicone for your project. Different types of silicone have different properties and are suitable for different applications. For example, Silicone used for making glassware molds is designed for making molds for glassware, while other types of silicone may be more suitable for other applications.
- Use a Release Agent: Using a release agent is essential to prevent the silicone from sticking to the mold. Make sure you apply the release agent evenly and thoroughly to the inside of the mold.
- Mix the Silicone Thoroughly: Make sure you mix the silicone and catalyst thoroughly to ensure that the mixture cures properly. Use a stir stick to mix the mixture well and remove any air bubbles.
- Let the Silicone Cure Completely: Make sure you let the silicone cure completely before removing it from the mold. This will ensure that the silicone is strong and durable.
- Experiment with Different Colors and Designs: Don't be afraid to experiment with different colors and designs to create unique and personalized wall art. You can use different pigments or dyes to create different colors, and you can also use different molds or techniques to create different designs.
Conclusion
Making DIY handmade silicone wall art is a fun and creative way to add a unique touch to your living space. By following the steps outlined in this guide, you can create your own stunning wall art using silicone. Remember to choose the right silicone, use a release agent, mix the silicone thoroughly, let the silicone cure completely, and experiment with different colors and designs. If you have any questions or need further assistance, please don't hesitate to contact us. We're here to help you create the perfect wall art for your home.
If you're interested in purchasing high-quality DIY handmade silicone products for your wall art projects, we invite you to contact us for a procurement discussion. We offer a wide range of silicone products that are suitable for various applications, and our team of experts can help you choose the right product for your needs.