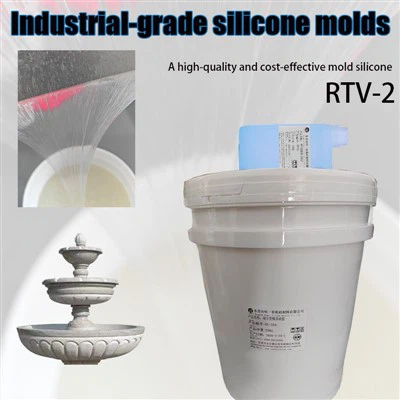
When it comes to applying LSR (Liquid Silicone Rubber) Adhesive, having the right tools is crucial for achieving optimal results. As a trusted LSR Adhesive supplier, I understand the importance of equipping you with the knowledge of the necessary tools for a successful application process. In this blog, we'll explore the essential tools required for applying LSR Adhesive and how they contribute to the overall quality of the project.
Surface Preparation Tools
Before applying LSR Adhesive, proper surface preparation is essential. This ensures that the adhesive bonds effectively to the substrate. The following tools are commonly used for surface preparation:
Cleaning Supplies
Cleaning the surface is the first step in preparing it for LSR Adhesive application. You'll need a variety of cleaning supplies, including lint-free wipes, isopropyl alcohol, and a spray bottle. Isopropyl alcohol is an excellent cleaning agent as it evaporates quickly and leaves no residue. Use the spray bottle to apply the alcohol to the surface and then wipe it clean with a lint-free wipe. This helps remove dirt, oil, grease, and other contaminants that could interfere with the adhesive bond.
Abrasive Pads or Sandpaper
In some cases, the surface may need to be roughened to improve the adhesive's grip. Abrasive pads or sandpaper can be used to gently scuff the surface. Choose the appropriate grit based on the substrate material. For example, a finer grit may be suitable for delicate surfaces, while a coarser grit can be used for more robust materials. After sanding, make sure to clean the surface again to remove any dust or debris.
Mixing Tools
LSR Adhesive often comes in two parts that need to be mixed thoroughly before application. Proper mixing ensures that the adhesive cures correctly and maintains its desired properties. The following tools are essential for mixing LSR Adhesive:
Mixing Containers
You'll need a clean, dry mixing container large enough to hold the required amount of adhesive. It's important to use a container made of a material that is compatible with the adhesive. For LSR Adhesive, plastic or metal containers are commonly used. Make sure the container has a smooth interior to facilitate easy mixing and pouring.
Mixing Sticks
A mixing stick is used to combine the two parts of the LSR Adhesive. Choose a stick that is long enough to reach the bottom of the mixing container and has a flat or slightly rounded end for efficient mixing. Wooden or plastic sticks are suitable for this purpose. Stir the adhesive slowly and thoroughly, scraping the sides and bottom of the container to ensure complete mixing.
Measuring Equipment
Accurate measurement of the two parts of the LSR Adhesive is critical for proper curing. Use measuring cups or syringes to ensure the correct ratio of the components. Most LSR Adhesives have a specific mixing ratio, such as 1:1 or 10:1. Follow the manufacturer's instructions carefully to achieve the best results.
Application Tools
Once the LSR Adhesive is mixed, it's time to apply it to the substrate. The choice of application tool depends on the specific requirements of the project, such as the size and shape of the area to be bonded, the thickness of the adhesive layer, and the desired finish. The following tools are commonly used for LSR Adhesive application:
Dispensing Guns
Dispensing guns are a popular choice for applying LSR Adhesive, especially for large or irregularly shaped areas. They allow for precise control of the adhesive flow and can be used to apply the adhesive in a continuous bead. There are different types of dispensing guns available, including manual and pneumatic guns. Manual guns are suitable for small-scale applications, while pneumatic guns are more efficient for larger projects.
Brushes
Brushes can be used to apply LSR Adhesive to small or detailed areas. Choose a brush with soft bristles that are suitable for the adhesive's viscosity. Dip the brush into the adhesive and apply it evenly to the substrate, following the contours of the surface. Make sure to apply the adhesive in a thin, uniform layer to avoid drips and air bubbles.
Syringes
Syringes are ideal for applying LSR Adhesive to precise locations or for filling small gaps and holes. They provide excellent control and can deliver a small amount of adhesive at a time. Use a syringe with a fine tip for accurate application. Make sure to clean the syringe thoroughly after use to prevent the adhesive from curing inside.
Additive Tools (Optional)
In some cases, you may need to use additives to modify the properties of the LSR Adhesive, such as its viscosity, curing time, or color. The following tools can be used in conjunction with the additives:
Stirrers for Additives
If you're using an additive like the Liquid Silicone Rubber Thinner or Liquid Silicone Rubber Accelerator, a stirrer is necessary to ensure proper dispersion in the adhesive. A small handheld stirrer or a magnetic stirrer can be used depending on the quantity of the mixture.
Color Mixing Tools
For projects that require a specific color, Eco - friendly Color Pigments for Silicone can be added to the LSR Adhesive. You'll need a palette and a set of mixing tools, such as spatulas, to blend the pigments evenly with the adhesive. This ensures a consistent color throughout the application.
Leveling Agent Applicators
When using a Liquid Silicone Rubber Leveling Agent, an applicator is needed to spread it evenly over the adhesive surface. A foam roller or a flat - edged blade can be used to apply the leveling agent in a thin layer, helping to create a smooth and even finish.
Retarder Dispensers
If you need to slow down the curing process of the LSR Adhesive, a Liquid Silicone Rubber Retarder can be used. A dropper or a small syringe can be used to accurately dispense the retarder into the adhesive mixture.
Curing and Finishing Tools
After applying the LSR Adhesive, it needs to cure properly to achieve its full strength. The following tools can help with the curing process and the final finishing of the bonded parts:
Ovens or Heat Guns
Some LSR Adhesives require heat to cure faster or to achieve specific properties. An oven can be used for large parts or when a uniform curing temperature is needed. Heat guns are more suitable for small areas or when spot curing is required. Make sure to follow the manufacturer's instructions regarding the curing temperature and time.
Release Agents and Molds (if applicable)
If you're using LSR Adhesive in a molding process, release agents are necessary to ensure that the cured part can be easily removed from the mold. Apply the release agent to the mold surface before pouring the adhesive. Choose a release agent that is compatible with the LSR Adhesive and the mold material.


Troubleshooting and Quality Control Tools
During the application process, it's important to monitor the quality of the adhesive bond and address any issues that may arise. The following tools can be used for troubleshooting and quality control:
Magnifying Glass
A magnifying glass can be used to inspect the adhesive bond for any signs of defects, such as air bubbles, gaps, or uneven application. This helps ensure that the bond meets the required quality standards.
Hardness Testers
Hardness testers can be used to measure the hardness of the cured LSR Adhesive. This is an important quality control parameter as it indicates the adhesive's strength and durability.
Conclusion
Applying LSR Adhesive requires a combination of the right tools and proper techniques. By using the tools mentioned in this blog, you can ensure a successful application process and achieve high - quality adhesive bonds. As a leading LSR Adhesive supplier, we are committed to providing you with the best products and support. If you have any questions about the tools needed for LSR Adhesive application or would like to discuss your specific project requirements, we encourage you to contact us for a procurement consultation. Our team of experts is ready to assist you in finding the most suitable solutions for your needs.
References
- Manufacturer's instructions for LSR Adhesive products.
- Industry standards and best practices for adhesive application.