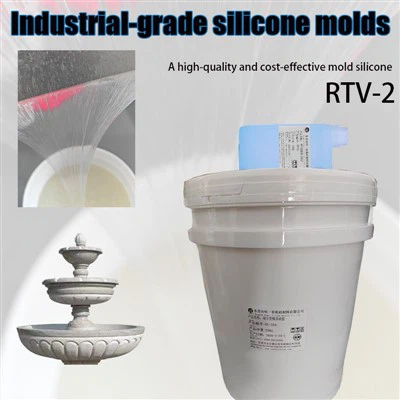
As a DIY handmade silicone supplier, I'm thrilled to share with you the exciting world of creating your own silicone wall decals. These decals can add a personal touch to any room, and the process of making them is both fun and rewarding. In this blog post, I'll guide you through the step-by-step process of making DIY handmade silicone wall decals, from choosing the right materials to the final application.
Understanding the Basics of Silicone for Wall Decals
Before we dive into the process, it's important to understand the types of silicone that are suitable for wall decals. There are different types of silicone available, and choosing the right one is crucial for the success of your project. One of the key factors to consider is the type of curing system. For wall decals, condensation cure silicone is often a great choice. You can learn more about Condensation Mold Silicone on our website.
Condensation cure silicone is known for its ease of use and good adhesion properties. It cures at room temperature, which makes it convenient for DIY projects. Additionally, it has relatively low shrinkage, which is important for maintaining the shape and details of your wall decals. Another type of silicone that you might come across is addition cure silicone. While it offers high precision and zero shrinkage, it's often more expensive and requires more careful handling. If you're interested in achieving high precision and zero shrinkage for perfect replication, you can read more about it here: How To Achieve High Precision And Zero Shrinkage For Perfect Replication?
Choosing the Right Silicone Liquid
The next step is to choose the right silicone liquid for making the wall decals. The silicone liquid is the base material that will form the decals. When selecting the silicone liquid, you need to consider factors such as its viscosity, hardness, and color. For wall decals, you might prefer a silicone liquid with a medium viscosity, which is easy to pour and spread.
The hardness of the silicone is also important. A softer silicone will be more flexible and easier to apply to curved surfaces, while a harder silicone will be more durable and hold its shape better. You can find more information about The Silicone Liquid Used For Making The Silicone Mold For Candles, which is also relevant to making wall decals.
In terms of color, you can choose a clear silicone liquid if you want to add your own colors later, or you can select a pre-colored silicone liquid if you prefer a specific color right from the start. Some silicone liquids also come with the option of adding dyes to customize the color according to your preference.
Gathering the Necessary Tools and Materials
Once you've chosen the right silicone, it's time to gather the necessary tools and materials for the project. Here's a list of what you'll need:
- Silicone liquid and catalyst: As mentioned earlier, choose the appropriate silicone liquid based on your needs. The catalyst is used to initiate the curing process of the silicone. Make sure to follow the manufacturer's instructions regarding the ratio of silicone to catalyst.
- Mold: You can create your own mold or purchase a pre-made one. The mold should be made of a material that is compatible with silicone, such as plastic or metal. You can use a variety of objects as molds, such as bowls, trays, or even textured surfaces.
- Measuring cups and spoons: Accurate measurement of the silicone and catalyst is crucial for the proper curing of the silicone. Use separate measuring cups and spoons for the silicone and catalyst to avoid contamination.
- Mixing stick: A wooden or plastic stick is needed to mix the silicone and catalyst thoroughly. Make sure to mix the two components evenly to ensure a uniform curing process.
- Release agent: A release agent is used to prevent the silicone from sticking to the mold. You can use a specialized silicone release agent or a common household item such as petroleum jelly.
- Knife or scissors: You'll need a sharp knife or scissors to cut the silicone decals after they have cured.
- Wall adhesive: Once the decals are ready, you'll need a suitable wall adhesive to attach them to the wall. Make sure to choose an adhesive that is compatible with both the silicone and the wall surface.
Preparing the Mold
Before you start mixing the silicone, it's important to prepare the mold. Apply a thin layer of release agent to the inside of the mold. This will make it easier to remove the silicone decals once they have cured. Make sure to cover all the surfaces of the mold, including any intricate details.
If you're using a textured mold, you can use a small brush to apply the release agent evenly. Let the release agent dry completely before proceeding. This step is crucial for ensuring that the silicone decals come out of the mold smoothly and without any damage.
Mixing the Silicone
Now it's time to mix the silicone and the catalyst. Start by measuring the appropriate amounts of silicone and catalyst according to the manufacturer's instructions. Pour the silicone into a clean mixing container, and then add the catalyst. Use a mixing stick to stir the two components together thoroughly.
Make sure to scrape the sides and bottom of the container to ensure that all the silicone and catalyst are mixed evenly. Keep stirring for at least 2-3 minutes to ensure a homogeneous mixture. During the mixing process, you may notice some air bubbles forming in the silicone. To remove these air bubbles, you can tap the mixing container gently on a hard surface or use a vacuum chamber if you have one.
Pouring the Silicone into the Mold
Once the silicone is well-mixed, carefully pour it into the prepared mold. Start pouring from one end of the mold and slowly move the container to ensure that the silicone fills all the corners and details of the mold. If there are any air bubbles trapped in the silicone, you can use a toothpick or a small needle to pop them.


Let the silicone sit in the mold for the recommended curing time. The curing time will depend on the type of silicone and the environmental conditions. In general, condensation cure silicone takes about 24 hours to fully cure at room temperature. However, it's always a good idea to check the manufacturer's instructions for the exact curing time.
Removing the Silicone Decals from the Mold
After the silicone has cured, it's time to remove the decals from the mold. Gently flex the mold to loosen the silicone decals. Start from one corner and slowly peel the decals away from the mold. If the decals are difficult to remove, you can use a small spatula or a knife to gently pry them loose.
Once the decals are removed from the mold, inspect them for any defects or air bubbles. If there are any small imperfections, you can use a sharp knife or sandpaper to smooth them out. You can also trim the edges of the decals to give them a clean and professional look.
Adding Colors and Finishes
If you've used a clear silicone liquid, you can now add colors and finishes to your decals. There are several ways to do this. You can use Condensation Mold Silicone Inks For Lotus Candles, which are also suitable for coloring silicone wall decals. These inks come in a variety of colors and can be easily applied to the surface of the decals using a brush or a sponge.
Another option is to use acrylic paints. Make sure to choose paints that are compatible with silicone. Apply the paint in thin layers, allowing each layer to dry completely before applying the next one. You can also add a clear coat of varnish or sealant to protect the colors and give the decals a shiny finish.
Applying the Wall Decals
Once your decals are ready, it's time to apply them to the wall. Clean the wall surface thoroughly to remove any dust, dirt, or grease. This will ensure a good adhesion between the decals and the wall.
Apply a thin layer of wall adhesive to the back of the decals. Make sure to cover the entire surface evenly. Carefully place the decals on the wall, starting from one corner and pressing them firmly against the wall. Use a smooth object, such as a credit card, to smooth out any air bubbles or wrinkles.
Allow the adhesive to dry completely according to the manufacturer's instructions. Once the adhesive is dry, your DIY handmade silicone wall decals are ready to be admired!
Conclusion
Making DIY handmade silicone wall decals is a fun and creative way to add a personal touch to your home. By following the steps outlined in this blog post, you can create beautiful and unique wall decals that will enhance the look of any room.
As a DIY handmade silicone supplier, we offer a wide range of high-quality silicone products and materials to help you bring your creative ideas to life. Whether you're a beginner or an experienced DIYer, our products are designed to meet your needs. If you have any questions or need further assistance, please don't hesitate to contact us for a procurement discussion.
References
- Manufacturer's instructions for silicone products
- DIY craft blogs and websites