Hey there, crafty folks! If you're into DIY projects and love adding a personal touch to your living space, then making DIY handmade silicone window clings is an absolute blast. And guess what? I'm a DIY handmade silicone supplier, so I'm here to share all the tips and tricks with you.
Getting Started: What You'll Need
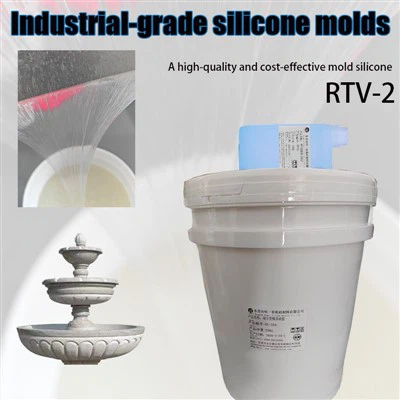
First things first, let's talk about the materials. You're going to need a few key items to get this project off the ground. Of course, the star of the show is the silicone. We offer Industrial-grade Silicone For Molds that's perfect for this kind of project. It's durable, flexible, and easy to work with.
In addition to the silicone, you'll also need some silicone inks. Our Condensation Mold Silicone Inks For Veitnam Candles are a great choice. They come in a wide variety of colors, so you can create some really eye-catching window clings.
Other essential items include a mold. You can either buy a pre-made mold or make your own. If you're feeling creative, making your own mold is a great way to add a unique touch. And don't forget about a mixing container and a stirring stick. You'll need these to combine the silicone components properly.
Preparing Your Workspace
Before you start mixing up your silicone, it's important to set up a clean and well-ventilated workspace. Silicone can be a bit messy, so laying down some newspaper or a drop cloth is a good idea. Make sure you have all your materials within reach, so you don't have to stop and search for something in the middle of the process.
Mixing the Silicone
Now, let's get to the fun part – mixing the silicone. Most silicone products come in two parts: a base and a catalyst. You'll need to measure out the correct amounts of each according to the manufacturer's instructions. Usually, it's a 1:1 ratio, but it can vary depending on the product.


Pour the base and the catalyst into your mixing container. Then, use your stirring stick to mix them together thoroughly. Make sure you scrape the sides and bottom of the container to ensure that all the silicone gets mixed. This step is crucial because if the silicone isn't mixed properly, it won't cure correctly.
Adding Color
Once your silicone is mixed, it's time to add some color. Take a small amount of the Condensation Mold Silicone Inks For Veitnam Candles and add it to the silicone. Start with a small amount and gradually add more until you get the color you want. Stir it well to make sure the color is evenly distributed.
Filling the Mold
Now that your silicone is mixed and colored, it's time to fill the mold. Slowly pour the silicone into the mold, making sure to fill all the nooks and crannies. You can use a toothpick or a small tool to help push the silicone into any hard-to-reach areas.
Once the mold is filled, tap it gently on the table to get rid of any air bubbles. Air bubbles can cause imperfections in your window clings, so it's important to get rid of them as much as possible.
Curing the Silicone
After filling the mold, you'll need to let the silicone cure. The curing time can vary depending on the type of silicone you're using and the temperature of your workspace. Usually, it takes a few hours to a day for the silicone to fully cure.
During the curing process, make sure to leave the mold in a safe place where it won't be disturbed. Avoid touching the silicone or moving the mold until it's completely cured.
Removing the Window Clings from the Mold
Once the silicone is cured, it's time to remove the window clings from the mold. Gently flex the mold to release the window cling. If it's stuck, you can use a small tool to help ease it out. Be careful not to damage the window cling or the mold.
Adding Stickiness
Now that you have your window clings, you'll need to make them sticky so they can adhere to the window. You can use a special adhesive spray or a sticky gel. Apply a thin layer of the adhesive to the back of the window cling.
Applying the Window Clings
Finally, it's time to apply the window clings to the window. Clean the window surface first to make sure there's no dirt or dust. Then, carefully place the window cling on the window and smooth it out to get rid of any air bubbles.
Other Uses for Silicone
Silicone isn't just great for making window clings. It has a wide range of other uses too. For example, you can use it to make Cultural stone mold silicone liquid for creating realistic-looking cultural stone surfaces. Or, if you're into candle-making, you can use the The Silicone Liquid Used For Making The Silicone Mold For Candles to make custom candle molds. And if you're interested in creating beautiful lotus lanterns, To Create Exquisite Lotus Lantern Molds, Choosing The Right Industrial-grade Mold Silicone Is The Key.
Contact Us for Your DIY Needs
If you're interested in starting your own DIY handmade silicone projects, whether it's making window clings or any of the other amazing things you can do with silicone, we're here to help. We're a leading DIY handmade silicone supplier, and we offer high-quality products at great prices.
So, if you have any questions or are ready to place an order, just reach out. We're happy to assist you in any way we can. Let's get crafting and create some amazing things together!
References
- Manufacturer's instructions for silicone products
- Online resources on DIY silicone crafts